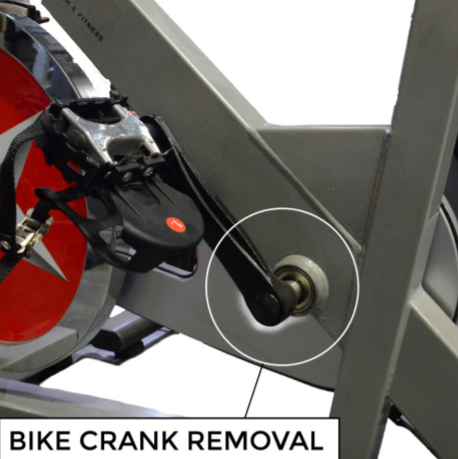
Crank Removal Guide
Removing the crank of your bicycle is not usually necessary, however, some customers might need to replace the crank after wear and tear issues. You may also be required to remove the crank in order to remove the casing of your chain/belt drive. Please read the guide thoroughly for step-by-step instructions on removing your bike’s crank. Please e-mail us at support@sunnyhealthfitness.com with any additional questions.
STEP 1: In order to immobilize your crank and flywheel, turn the tension resistance level or knob to the highest setting. This will keep your crank from moving forward or backward while removing the equipment piece.
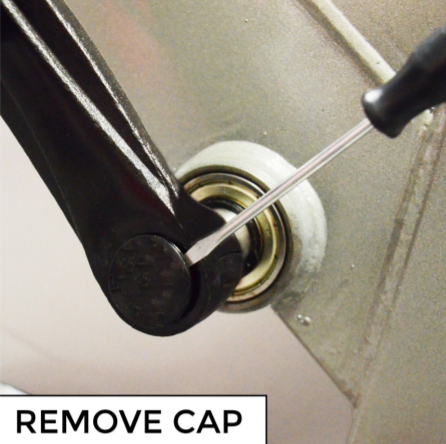
STEP 2: Begin the crank removal process by removing the crank’s “cap” piece. You can do this with a flathead screwdriver. This should just “pop” right off.
*Sunny Health and Fitness does not recommend or condone using a pocket knife as it may scrape the cap.
RIGHTY—TIGHTY and LEFTY—LOOSEY
Please remember this phrase to help you in this process.
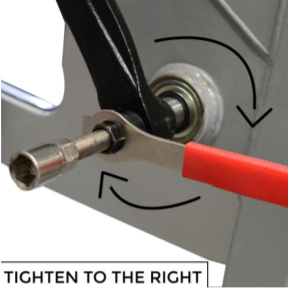
In this next section, you will need to use a “Crank Tool”. You can purchase this piece through Amazon or Walmart. The Crank Tool does not come pre-assembled. To assemble, connect both the black and silver sockets to the center screw. Make sure your “red handled wrench” (you can use any wrench that fits if your crank puller did not come with this piece) is placed in between the screw.
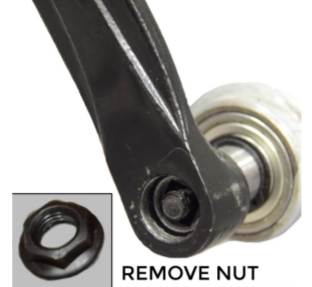
STEP 3: Once the Crank Tool is assembled, insert the silver socket into the crank. Use the red wrench to “loosen” the flange nut that needs to be removed. Turn the wrench “counter-clockwise” or “left”.
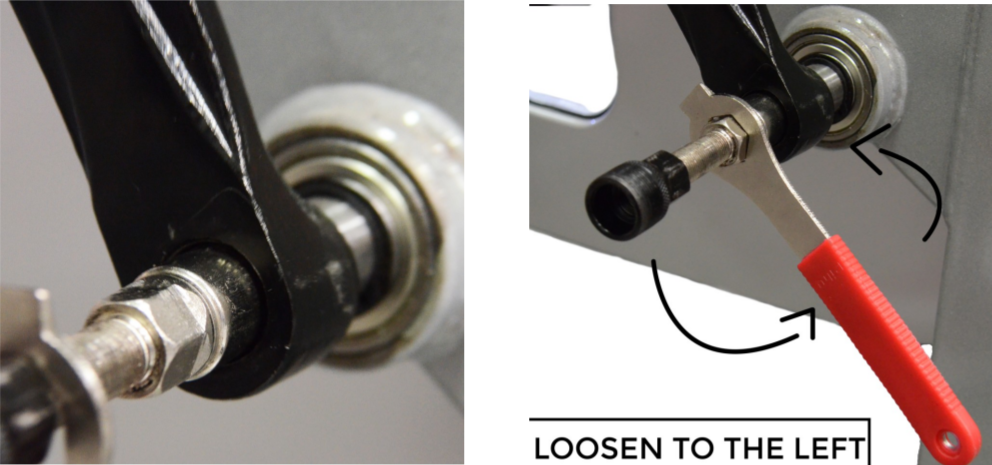
STEP 3.1: Continue loosening until the flange nut is removed. Great job! Just a few more steps.
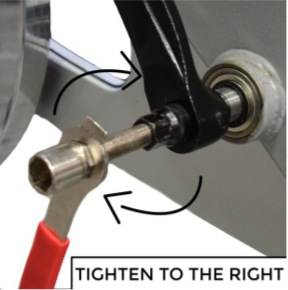
STEP 4: Now, insert the BLACK socket into the crank. Tighten this piece to the crank. You can use your finger or the wrench. Make sure the black socket cannot be removed. (The black socket piece should ONLY fit snuggly. DO NOT tighten too much otherwise you won’t be able to do step 5 correctly.)
STEP 5: Now slide the red wrench so it connects to the silver socket. Turn your wrench “clockwise” or “right”. You will feel your crank beginning to come off.
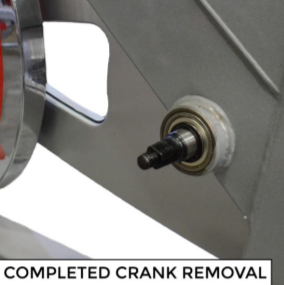
STEP 6: Keep turning until the crank is removed. Great Job! Your crank is completely removed.
You can now replace the crank with a new one, or get to your belt.
For more information, please see the video below:
Comments
0 commentsArticle is closed for comments.