Tension Cable Troubleshooting Guide
In order for the tension on your exercise equipment to work properly, you will need to manually assemble the tension cables together. Follow the step-by-step instructional guide to learn how to properly assemble your tension cables together so you can increase or decrease the correct resistance.
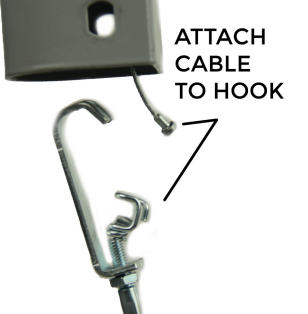
Proper tension cable assembly is important for your machine to be able to increase and decrease resistance. First, you will need the top cable to be at its longest length so it shows from the handlebar post. Do this by setting your resistance knob or lever to the highest or lowest setting (depending on your machine) in order for the cable to release to its longest length. This allows you more room to attach the cable to the hook.
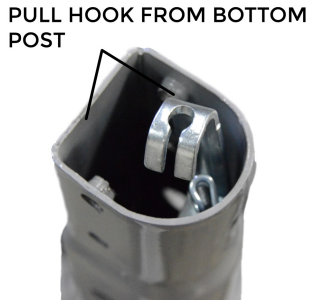
You can pull the tension cable hook out of the bottom post for a better scope. Now that you can see the top and bottom cables, you will need to attach them to your exercise machine to work.
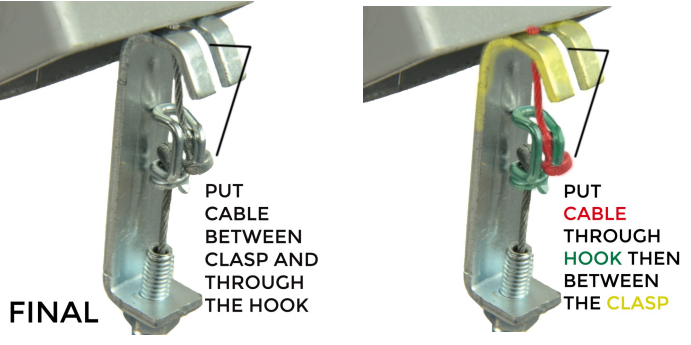
Your next step is attaching the cables. This part is much easier if you have some help. Have a partner hold the handlebar post while you connect the cables together. First, place the cable in between the hook piece. Second, place the cable between the opening of the clasp. The illustration shows how the pieces should look. Once this action is complete, pull the top handlebar post up, to lock and hook the tension cables in place. See next page for illustrations.
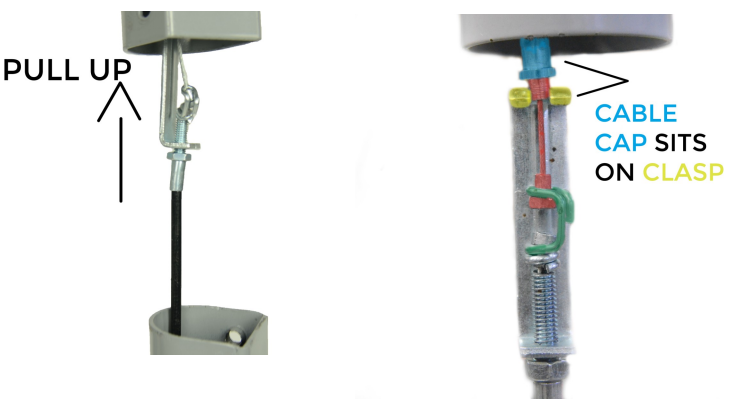
After you have successfully attached the two tension cables, you will need to pull your top handlebar post up which will lock the tension cables into place. Make sure the wire cap sits on top of the clamp before you connect the handlebar posts back together. You can now put the metal handlebar posts back together and bolt them together.
Comments
0 commentsArticle is closed for comments.